One of the main reasons to pickup a Raspberry Pi is to learn Linux and specifically embedded Linux. The Raspberry Pi boards contain ARM processors that can easily run various flavors of Linux. While the main OS supported out of the box is Raspberry Pi OS, there’s no reason why you can’t run other distributions of Linux. In fact, we highly recommend that you explore this to learn more about Linux and the Raspberry pi.
Supported Linux Distros for Raspberry Pi
Aside from Raspberry Pi OS, there’s quite a few supported Linux distributions for Raspberry Pi boards, including even the latest Raspberry Pi 5.
- Ubuntu – One of the most popular Linux Desktop distros, Ubuntu 24.04 LTS is fully supports various Raspberry Pi boards including Raspberry Pi 5, Raspberry Pi zero, Raspberry Pi CM4, Raspberry Pi 4.
- Ubuntu Core 24 – for some Raspberry Pis that don’t have enough horsepower to run the full desktop distribution like the Raspberry Pi 3, the Ubuntu Core release is available
- Debian – While support for Raspberry Pi 5 is still not in place, the Raspberry Pi 4 has been supported up to Debian Bookwork (Debian 12). Raspberry Pi 3, and Zero 2W are also supported along with other versions. You can check the Tested Images page for more information.
- Kali Linux – a favorite of Pen Testers and security researchers everywhere, Kali Linux is another popular distribution. Kali Linux supports Raspberry Pi 2, 3, 4 and 400, and you can run and try the 64-bit images. Support for Raspberry Pi 5 is still early (for example, it’s missing wireless support for the internal Wi-Fi chip)
Using the Raspberry Pi Imager for Existing Linux Images
If you’ve done any Linux work over the years, you know that you need to flash an image on an SD card. There are a lot of utilities that you can use for this, but the Raspberry Pi Foundation has released the Raspberry Pi Imager that makes this easy.
You can download the Raspberry Pi Imager for Windows, Mac OS and Ubuntu. Once installed, you have a lot of options, including the ability to use ready to go Raspberry Pi OS or other Linux distributions.
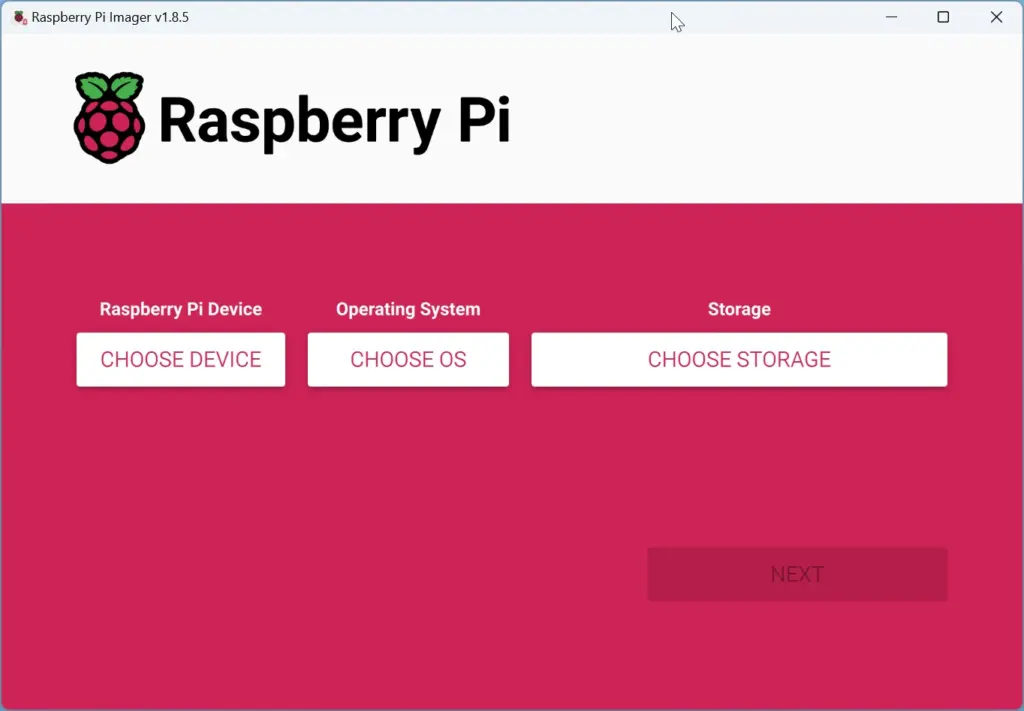
The Raspberry Pi screen has three choices:
- Choose Device – Choose the Raspberry Pi for which this SD card will be used. This option also filters the available OS in the Choose OS option to match the device you select.
- Choose OS – Either a standard list of OSes that are available or use a custom one.
- Choose Storage – Use this to select the micro SD device you’re going to use
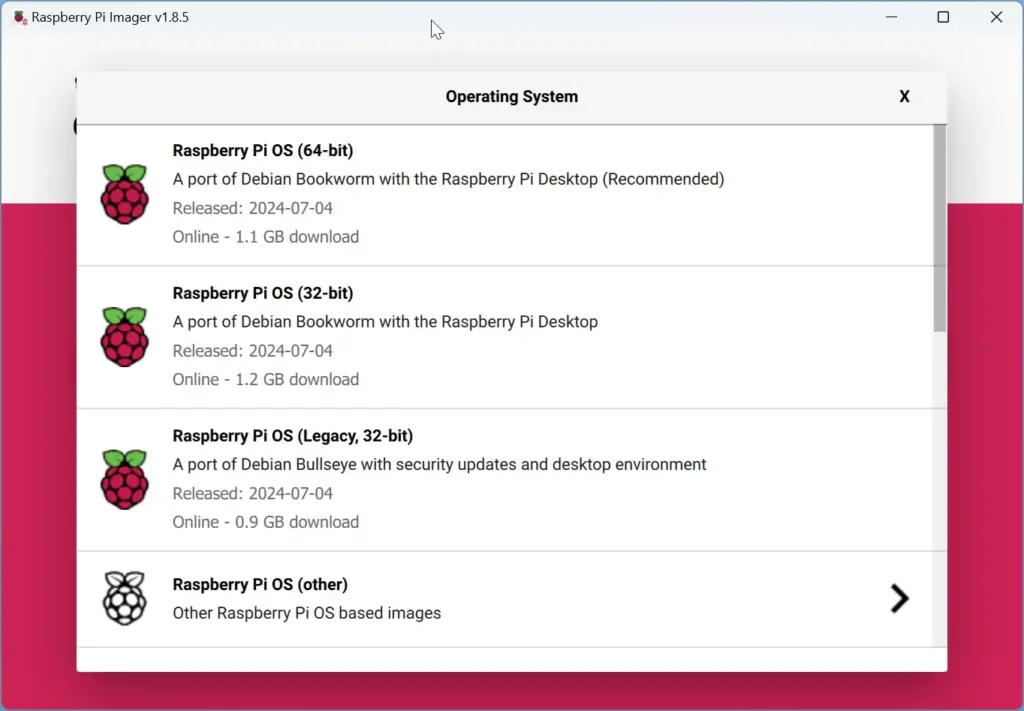
You can pick the latest version of the Raspberry Pi OS or others. But we’re here to understand how to install other Linux distributions. The good news is that there’s a lot of other out of the box versions, as you can see:
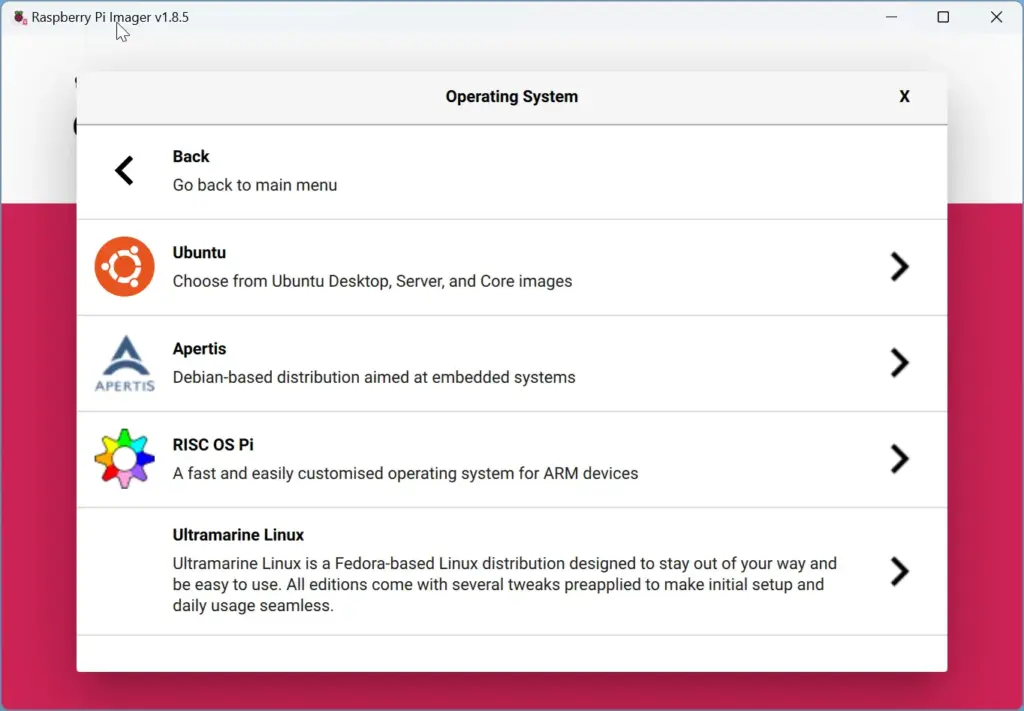
You can see that the Raspberry Pi Imager lets you get a Ubuntu image directly. So let’s choose that.
The first step in the Raspberry Pi Imager is to select the specific Raspberry Pi you’re using. We’ll pick a Raspberry Pi 5. In the Operating System screen, select General Purpose OSes, then choose Ubuntu Desktop 24.04 LTS (64-bit). You could choose Ubuntu Core which removes a lot of extra packages and provides a much more slimmed experience.
Once you’ve chosen, click on Choose Storage, select your SD card and let it write the image. Once it’s done, insert the SD card in your Raspberry Pi and boot it by inserting the power.
Flashing Custom Linux Images for the Raspberry Pi
Using the RPI Imager is great, but one of the downside of using the existing Linux images is that you only get what’s provided. Often you’ll want something that isn’t supported, possibly a newer image that isn’t yet supported, or even a custom build. So, let’s get a custom Linux distribution.
First select the specific Raspberry Pi you’re using. We’ll pick a Raspberry Pi 5. In the Operating System screen, scroll all the way down and select Use Custom
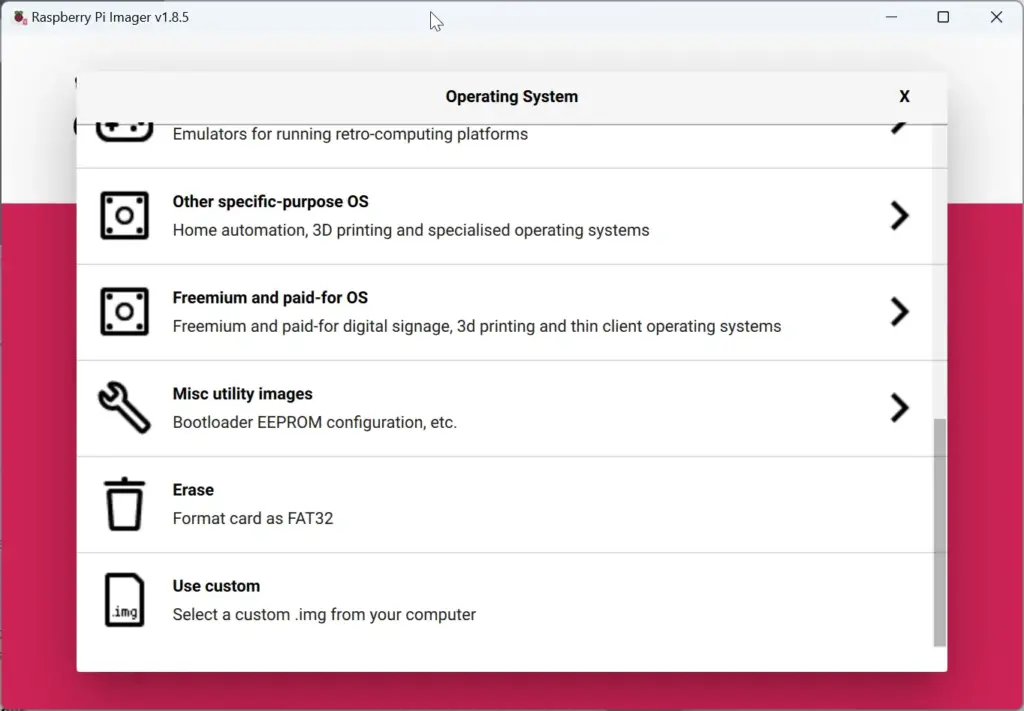
Select the kali image file that you downloaded. Then choose the storage to be the micro SD card. Note that you should be using at least 32GB since smaller SD cards will run into issues sometimes, but this depends on the specific distribution.
Once the SD card is flashed, you can insert it in the micro SD card slot of the board and power it up.

